
Improve slow Wi-Fi. Reduce interference. Learn how to change wifi channel. Your router’s Wi-Fi channel can be less crowded. Many nearby networks use the same frequency. This creates signal interference. It slows wireless data speeds. Choose a non-overlapping channel. This eliminates the issue.
This guide explains how Wi-Fi channels impact speed and interference. It details how to find your router’s IP address and login credentials, scan your area for the best channel, and choose the most suitable band and channel for your network. You will also find step-by-step instructions for changing your Wi-Fi channel.
Why changing your Wi-Fi channel fixes slow speed and interference
Wi-Fi channels are specific frequency segments within the broader wireless spectrum that your router uses to communicate with connected devices. Imagine them as distinct lanes on a highway; when too many Wi-Fi networks broadcast on the exact same lane, traffic slows down for everyone.
Co-channel interference occurs when multiple nearby networks operate on the exact same channel. Wi-Fi uses a Listen-Before-Talk protocol called CSMA/CA (Carrier Sense Multiple Access with Collision Avoidance). When multiple routers share a single channel, every device must wait for a clear silence before transmitting data packets. This constant waiting forces packet re-transmissions, increases ping times, and degrades your effective speed, especially in dense urban areas or apartment buildings.
Adjacent channel interference happens when networks operate on overlapping frequencies that are not identical. In the 2.4 GHz band, channels are 20 MHz wide but separated by only 5 MHz. If your network uses channel 3 while a neighbor uses channel 4, the signals overlap unevenly. This creates severe electrical noise, confusing network cards and forcing packet drops without allowing CSMA/CA to coordinate transmissions. Selecting non-overlapping channels eliminates this issue.
How to find your router IP address and login details
To access your router settings and change your Wi-Fi channel, you must locate its local IP address. Most manufacturers assign default IP addresses, but you can find the exact address on any connected computer or smartphone.
On Windows, open the Start menu, type cmd to open Command Prompt, type ipconfig, and press Enter. Look for the entry labeled Default Gateway; the numbers listed next to it (such as 192.168.1.1 or 10.0.0.1) are your router address.
On macOS, open System Settings, select Network, click on your connected Wi-Fi connection, click Details, and select TCP/IP. The router IP address appears next to Router.
On iOS devices, go to Settings, select Wi-Fi, and tap the information icon next to your network name. Scroll down to find the IP address listed under Router. On Android, go to Settings, select Network & Internet, tap Wi-Fi, select your network settings gear, expand Advanced, and look for Gateway.
Once you have the IP address, enter it directly into your web browser’s address bar. You will be prompted for an administrator username and password. If you have not altered these credentials, check the printed label on the bottom or back of your router. Common factory defaults include username admin and password admin or password. If you changed your login credentials and forgot them, press and hold the physical reset button on the back of your router for 10 to 15 seconds to restore factory default settings.
How to scan your area for the best Wi-Fi channel
Before manually assigning a channel in your settings, scan your local wireless airwaves to identify which channels are crowded and which are clear. Wi-Fi analyzer tools measure signal strength in decibel-milliwatts (dBm) and list active access points in your range.

For Windows users, applications like Wi-Fi Analyzer from the Microsoft Store provide a clear visual representation of channel usage and local signal degradation.
macOS includes a hidden diagnostic scanner built directly into the system. Hold down the Option key on your keyboard, click the Wi-Fi icon in the top menu bar, and choose Open Wireless Diagnostics. Ignore the setup window that pops up; instead, select Window from the top menu bar, click Scan, and then click Scan Now. The tool will list nearby networks, their signal strengths, and explicit channel recommendations for both 2.4 GHz and 5 GHz networks.
Mobile users on Android can download apps such as NetSpot or Wi-Fi Analyzer from the Google Play Store. On iOS, Apple limits third-party access to Wi-Fi scanning APIs. However, you can download Apple’s official AirPort Utility app from the App Store, open your iPhone Settings menu, select AirPort Utility, toggle on Wi-Fi Scanner, and run detailed channel scans directly within the app.
Which Wi-Fi band and channel should you choose?
Modern routers operate across up to three distinct wireless frequency bands: 2.4 GHz, 5 GHz, and 6 GHz. Each frequency band offers different performance characteristics, signal propagation ranges, and channel availability.
| Frequency Band | Coverage Range | Non-Overlapping Channels | Interference Risk | Best Use Case |
|---|---|---|---|---|
| 2.4 GHz | Long range, penetrates thick walls | 3 channels (1, 6, 11) | High (crowded band, household appliances) | Smart home IoT devices, basic web browsing |
| 5 GHz | Medium range, moderate wall penetration | 25+ channels (UNII-1, UNII-2, UNII-3) | Low to Moderate | 4K streaming, online gaming, remote work |
| 6 GHz | Short range, line of sight | Up to 59 non-overlapping channels | Very Low (no legacy device congestion) | Wi-Fi 6E/7 VR gaming, ultra-high speed transfers |
Selecting channels on the 2.4 GHz band
The 2.4 GHz band spans 11 to 13 channels depending on your country. However, because each channel is 20 MHz wide and channels are spaced only 5 MHz apart, there are only three non-overlapping channels: 1, 6, and 11. Always set your 2.4 GHz network to channel 1, 6, or 11, and keep channel width locked at 20 MHz. Choosing intermediate channels like 2, 3, or 8 creates adjacent channel interference with neighboring networks, degrading performance for everyone on the spectrum.
Selecting channels on the 5 GHz band
The 5 GHz band offers significantly higher bandwidth and more than 25 non-overlapping channels. Channels 36, 40, 44, and 48 fall under the UNII-1 band and are universally supported across all wireless devices. Higher channels like 149, 153, 157, 161, and 165 fall under UNII-3 and allow higher transmission power in many regions.
Channels 52 through 144 are designated as DFS (Dynamic Frequency Selection) channels. These frequencies share spectrum with weather radar and military radar systems. If your router detects radar activity while assigned to a DFS channel, it must instantly switch to a non-DFS channel, causing a brief disconnect. If you live near an airport or weather station, stick to non-DFS channels like 36-48 or 149-161.
Selecting channels on the 6 GHz band
The 6 GHz band, introduced with Wi-Fi 6E and standard on Wi-Fi 7 (802.11be) routers as of 2026, provides up to 59 additional 20 MHz channels. This massive spectrum expansion allows wide channel bonding (160 MHz and 320 MHz) without overlapping neighboring networks. According to the Federal Communications Commission (FCC) as of 2026, this expanded spectrum is critical for supporting high-density wireless environments. 6 GHz devices utilize Preferred Scanning Channels (PSC) spaced every 80 MHz (channels 5, 21, 37, 53, 69, 85, etc.) to allow client devices to discover access points rapidly.
Step-by-step instructions for changing your Wi-Fi channel
While router interface layouts vary by brand, the core steps required to switch channels remain consistent across manufacturers.

- Log in to your router web interface: Open a browser on a device connected to your network, enter your router IP address (e.g., 192.168.1.1), and log in with your administrative credentials.
- Locate wireless setup: Go to the Wireless, Wi-Fi Settings, Advanced Wireless, or Wireless Setup tab in the navigation menu.
- Select your target frequency band: Separate setup options exist for 2.4 GHz, 5 GHz, and 6 GHz networks. Select the specific band you want to modify.
- Change channel selection: Locate the drop-down menu labeled Channel or Wireless Channel. Switch the value from Auto to your chosen numerical channel (for 2.4 GHz, choose 1, 6, or 11 based on your scan).
- Adjust channel width if necessary: Set 2.4 GHz channel width to 20 MHz. For 5 GHz, choose 40 MHz or 80 MHz depending on local congestion.
- Save and apply settings: Click Save or Apply. Your router will briefly restart its wireless radios, temporarily disconnecting your devices for 30 to 60 seconds before reconnecting on the new channel.
Changing channels on ISP-provided routers and Mesh Wi-Fi
If you use an internet service provider (ISP) gateway (such as Comcast Xfinity xFi, AT&T Smart Home Manager, or Spectrum), manual channel settings in the web browser interface may be locked out. These providers often mandate channel management via their proprietary smartphone apps or automatically select channels on their cloud servers. If your web interface lacks a channel dropdown, check your ISP’s mobile app under Wi-Fi Settings or Advanced Network Settings.
Mesh Wi-Fi systems (such as Eero, Google Nest WiFi, or Netgear Orbi) operate using dynamic mesh backhaul networks. They actively evaluate channel performance across all satellite nodes and change channels automatically in the background. Most mesh systems deliberately omit manual channel selection controls to prevent network desynchronization between nodes.
Real-world example: Overcoming interference in a crowded building
Consider ‘The Zenith Towers’, a high-rise apartment building in downtown Seattle, known for its dense population. Residents frequently complained of slow Wi-Fi, even with high-speed internet plans. A tenant, Sarah, who works from home, struggled with video calls dropping.

Using a Wi-Fi analyzer, Sarah discovered that her 2.4 GHz network was on channel 6, as were six other strong networks in her immediate vicinity. Her 5 GHz network was on channel 36, but a neighbor’s strong signal also occupied channel 40, causing adjacent interference.
Sarah switched her 2.4 GHz network to channel 1, finding it almost entirely clear. For her 5 GHz network, she moved to channel 149, which her analyzer showed as completely unused by her neighbors.
This real-world example demonstrates the profound impact of strategic channel selection. The limitation here is that not all channels are available on all devices (e.g., older devices may not support higher 5 GHz channels), but a noticeable improvement is still often achievable.
Common mistakes when changing Wi-Fi channels
While selecting a custom Wi-Fi channel resolves connection bottlenecks, several technical mistakes can prevent performance gains or degrade your connection further.
Choosing arbitrary channels on the 2.4 GHz band is the most frequent mistake. Switching to channel 3, 4, or 8 might appear helpful because fewer routers list those specific numbers, but doing so forces your network into overlapping interference with networks on channels 1, 6, and 11 simultaneously.
Another mistake is setting channel width too wide in a congested area. Selecting 80 MHz or 160 MHz channel width on 5 GHz doubles or quadruples raw data speed in a clean environment, but it consumes four to eight standard channels at once. In an apartment building, a 160 MHz channel width almost guarantees overlap with neighboring networks, triggering packet loss and latency spikes. Reducing channel width to 40 MHz or 20 MHz often yields faster, more stable connections in crowded airwaves.
Finally, configuring only one band while ignoring the other leaves half of your network unoptimized. Dual-band and tri-band routers manage each frequency independently, requiring manual channel analysis for both 2.4 GHz and 5 GHz networks.
Troubleshooting common problems and how to change wifi channel
If you run into issues after altering your router channel configuration, review these fixes for common setup obstacles.
Your device cannot see or connect to the new Wi-Fi channel
If a laptop, older smartphone, or smart TV cannot detect your network after changing the 5 GHz channel, your device’s Wi-Fi card likely lacks support for higher frequency blocks (such as UNII-3 channels 149-165) or DFS channels (52-144). Switch your 5 GHz router channel back to lower non-DFS channels (36, 40, 44, or 48) to restore compatibility across older client hardware.
Your connection frequently drops on 5 GHz DFS channels
When assigned to DFS channels (52-144), your router continuously listens for radar pulses from weather stations or aviation systems. If radar signals are detected, Federal Communications Commission regulations mandate that the router immediately vacate the channel. This causes a sudden 60-second connection drop while the router shifts to a safe channel. If you experience unexpected disconnects, switch your 5 GHz network to a standard channel like 36 or 149.
Your router channel reverts back to Auto after a restart
Certain router firmware builds reset modified settings back to factory defaults if the configuration is not saved properly before rebooting. Ensure you click both Apply and Save Configuration inside the web interface. Additionally, verify whether an automated Wi-Fi Optimization or Auto-Channel Nightly Scan setting is active in your router settings, as this feature overrides manual channel choices during scheduled maintenance windows.
Advanced tips for Wi-Fi optimization beyond channels
Optimizing your Wi-Fi channel is one part of comprehensive network management. Several other adjustments can maximize throughput and stability across your premises.
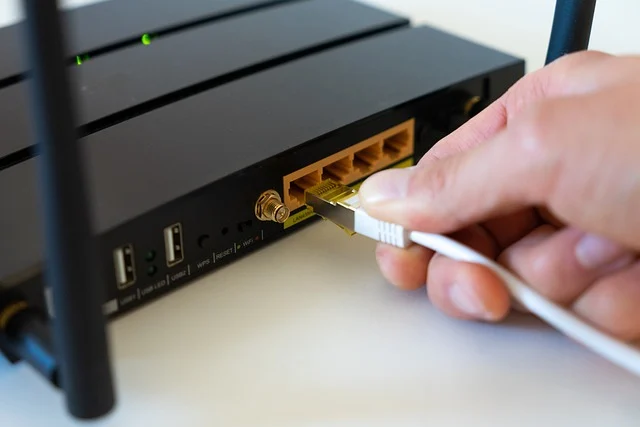
Keep your router firmware up to date. Hardware manufacturers publish regular updates that optimize wireless drivers, patch security vulnerabilities, and improve radio management. Check your administration menu for a built-in firmware update feature or download firmware files from the manufacturer support website.
Optimize physical router placement. Wireless signals weaken when traveling through brick walls, metal studs, plaster, and glass mirrors. Place your router in a central, elevated location away from electronic equipment like cordless phones, microwave ovens, and Bluetooth hubs that operate on competing frequencies.
Configure Quality of Service (QoS) parameters inside your router administration panel. QoS allows you to assign bandwidth priority to real-time applications like video conferencing, VoIP calls, and online gaming, ensuring high-priority packets are processed first even during peak household network usage.
Several other strategies can further enhance your wireless network’s performance and reliability.
Frequently asked questions
What are the non-overlapping channels for 2.4 GHz Wi-Fi?
For the 2.4 GHz band, the three non-overlapping channels are 1, 6, and 11. Using these specific channels minimizes co-channel and adjacent channel interference from surrounding networks. Always choose one of these three options when manually assigning a 2.4 GHz channel.
How often should I check my Wi-Fi channel?
You don’t need to check your Wi-Fi channel daily, but it’s a good practice to do so if you notice a consistent drop in performance. Changes in neighbor networks or new devices can alter local spectrum congestion. A quarterly check, or after a new neighbor moves in, is often sufficient.
Can changing my Wi-Fi channel improve speeds for all devices?
Yes, changing your Wi-Fi channel to a less congested option improves speed and reduces packet latency for all devices connected to that network band. However, older client hardware may be limited by its internal Wi-Fi chip standards regardless of channel clarity.
What is DFS and how does it affect 5 GHz channels?
DFS stands for Dynamic Frequency Selection, a system enabling 5 GHz Wi-Fi networks to utilize spectrum assigned to radar operations. If your router detects radar signals on a DFS channel, it automatically disconnects traffic and migrates to a non-radar channel to prevent signal interference.
Is ‘Auto’ channel selection always bad?
Auto channel selection works well in suburban areas or single-family homes with minimal neighboring networks. In high-density apartments or office buildings, however, auto-selection algorithms frequently fail to select the quietest channel or cycle between channels unnecessarily, making manual selection based on a scan superior.
Should I use a separate SSID for each Wi-Fi band?
Using separate network names (SSIDs) for 2.4 GHz, 5 GHz, and 6 GHz bands gives you direct control over which band your devices connect to. Band steering on unified SSIDs sometimes forces fast devices onto slower 2.4 GHz connections, making separate SSIDs preferable for bandwidth-demanding hardware.