To clean a keyboard safely, unplug it or turn off your device, turn it upside down, and gently shake out loose debris. Blast short bursts of compressed air between the keys, then wipe all surfaces using a microfiber cloth lightly dampened with 70% isopropyl alcohol to sanitize without moisture damage.
A grimy, dust-filled keyboard subtly degrades your daily typing speed, key responsiveness, and hygiene. Beyond performance, there is a significant sanitary factor: a 2018 study cited by PCMag noted that computer keyboards can harbor thousands of bacteria per square inch, often exceeding the bacterial counts found on standard household items. Learning how to clean a keyboard properly prevents key sticking, avoids switch failure, and extends the life of your hardware.
What supplies do you need before cleaning a keyboard?
Gathering the correct supplies before you start prevents accidental hardware damage and makes the job faster. Using improper chemicals or harsh scrubbers can strip keycap lettering, scratch finishes, or short-circuit printed circuit boards (PCBs).
- Microfiber cloths: Synthetic lint-free cloths hold onto dust particles rather than pushing them around, and they will not leave loose threads inside key mechanisms.
- Compressed air: A standard can of compressed air with a narrow straw nozzle removes loose debris, hair, and crumbs tucked beneath keycaps. Alternatively, an electric air duster works well.
- 70% isopropyl alcohol: This specific concentration dissolves skin oils, grime, and sticky residues while evaporating quickly. It disinfects surfaces efficiently without over-saturating underlying electronics.
- Wire keycap puller: Essential for standalone mechanical keyboards. Wire pullers are preferred over rigid plastic ring pullers because wire arms slide under keycaps without scratching the sides.
- Soft-bristled brush: A clean paint brush, soft makeup brush, or unused soft toothbrush helps dislodge stubborn dust around switch stems and plate cutouts.
- Cotton swabs: Ideal for precision cleaning in tight gaps, stabilizer grooves, and around switch housings.
- Warm water and mild dish soap: Required for soaking and washing removed keycaps during a deep clean.
How to quick-clean a keyboard in five minutes
For routine maintenance, a quick surface clean every week stops dust and skin oils from hardening into stubborn grime. This method works for desktop, wireless, and laptop keyboards without disassembling any parts.

- Disconnect and power off: Unplug the USB cable, turn off the power switch on wireless models, or shut down your laptop. Remove batteries if applicable. This prevents unintended key commands and protects internal circuits.
- Invert and gently shake loose debris: Hold the keyboard upside down over a trash can or towel. Gently shake and lightly tap the back of the casing to dislodge crumbs, hair, and dry dirt from between the keys.
- Blow out remaining particles with compressed air: Hold the compressed air can upright to prevent liquid propellant from spraying out. Keep the nozzle nozzle two to three inches away from the keys, sweeping across the layout at a 45-degree angle in short, controlled bursts.
- Wipe surface with an alcohol-dampened microfiber cloth: Apply 70% isopropyl alcohol directly to your microfiber cloth until lightly damp, never soaking wet. Gently wipe keycap tops, sides, and the perimeter frame to remove skin oils and fingerprints.
- Detail tight spots with cotton swabs: Lightly moisten a cotton swab with isopropyl alcohol to clean the narrow grooves between key rows and around perimeter bezels.
How to deep-clean a standalone mechanical or membrane keyboard
When keys become sticky, switches feel scratchy, or deep grime collects beneath the keycaps, a complete teardown and clean is necessary. Deep cleaning is meant for external desktop keyboards, not integrated laptop keypads.
- Photograph your keyboard layout: Take a clear photo of your layout with your phone before removing keycaps. This reference image guarantees every keycap, function key, and modifier key returns to its precise position during reassembly.
- Remove keycaps safely: Slide the wires of your keycap puller underneath opposite corners of a keycap until they catch the bottom edges. Pull straight up with smooth, steady upward force. Never twist or pry sideways, which can snap the keycap stem or damage the switch stem underneath.
- Soak and scrub keycaps: Place removed keycaps into a bowl filled with warm water and two drops of mild dish soap. Let them soak for 20 to 30 minutes. Gently agitate the water, then use a soft brush to scrub off oils or dirt build-up on individual keys. Rinse thoroughly with clean warm water.
- Brush and clear the exposed base plate: While keycaps are soaking, hold the base plate upside down over a trash bin and brush away dislodged dust. Blast remaining debris with compressed air across switch rows.
- Clean around switch housings: Dip a cotton swab in 70% isopropyl alcohol, squeeze out any excess liquid, and carefully wipe around each switch casing, metal plate, or membrane dome layer.
- Clean and inspect stabilizer bars: Larger keys such as Spacebar, Shift, and Enter utilize wire stabilizers. Clean off old caked-on grease and hair using an alcohol swab. If keypresses feel squeaky upon testing, apply a microscopic dab of dielectric grease to metal-on-plastic friction points.
- Dry keycaps completely: Lay cleaned keycaps upside down on a clean dry towel. Allow them to air dry for at least 12 to 24 hours. Moisture trapped inside stem sockets can drop into switches during reassembly and cause short circuits.
- Reassemble keycaps using your layout reference photo: Once keycaps are completely dry, snap each keycap onto its respective switch stem by pressing straight down until it clicks firmly in place. Align stabilizer clips carefully on large keys before pressing down.
How do you clean different types of keyboards?
The internal construction of your keyboard determines how aggressively you can clean it. Treating fragile laptop scissor switches like heavy-duty mechanical keycaps will lead to broken plastic clips.

Mechanical keyboards
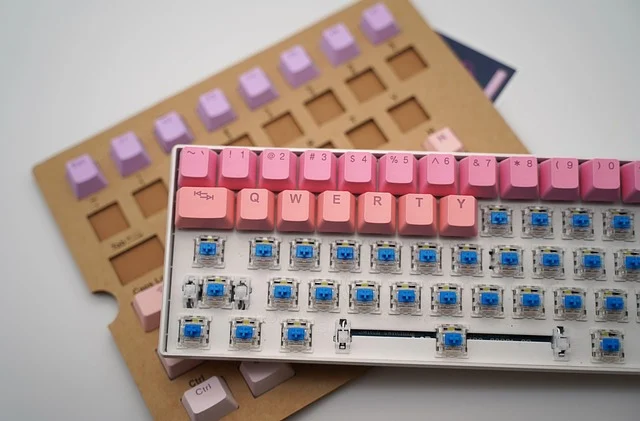
Mechanical keyboards are built with individual physical switches mounted on a steel or aluminum plate. They are the easiest and safest keyboards to deep clean because keycaps are designed for frequent removal. Because switches are self-contained, dust usually settles on the top plate around switch housings. Avoid spraying liquids into exposed switch stems, and stick to wire pullers when removing keycaps.
Membrane and dome-switch keyboards
Membrane keyboards use a flexible rubber dome sheet over a printed circuit sheet. Some membrane keycaps snap off, but their mounting tabs are fragile plastic that snaps easily if pulled off-center. Unless keycaps are specifically designed to be swappable, avoid removing them. Rely on quick-cleaning methods: inverted shaking, angled blasts of compressed air, and microfiber cloths dampened with 70% isopropyl alcohol.
Laptop keyboards
Laptop keyboards use delicate scissor-switch hinges under ultra-thin keycaps. Attempting to pry keycaps off modern laptops frequently breaks tiny plastic clips or tears the membrane underneath. Stick to gentle surface cleaning with an alcohol-dampened cloth and angled compressed air blasts. If your laptop gets hot under heavy loads, see Identify & Prevent Heat Damage on Your MacBook Pro Screen for thermal management tips that prevent internal dust buildup near cooling fans.
For older MacBook models fitted with butterfly switches, direct downward blasts of compressed air can push debris further beneath switch clips, causing total key unresponsiveness. Hold the laptop vertically at a 75-degree angle and sweep compressed air horizontally across key rows. Major PC manufacturers like HP provide specific guidance on laptop keyboard cleaning that highlights avoiding liquid excess around integrated components.
How to handle sticky keys and liquid spills
Sticky key action is almost always caused by dried beverage spills, sugary liquids, or accumulated grease inside switch stems. Acting fast prevents permanent circuit damage.

Fixing a single sticky key stem
If only one key sticks on a mechanical keyboard, pull that keycap off. Saturate a cotton swab in high-purity isopropyl alcohol and liberally swab the stem area while depressing the switch plunger repeatedly. The alcohol dissolves dried sugar and oil residues without conducting electricity. Allow 15 minutes for complete evaporation before replacing the keycap.
Emergency liquid spill response
- Cut power instantly: Unplug the keyboard cable immediately, or turn off your laptop instantly using the power button. Do not shut down through operating system menus when liquid is actively seeping into hardware.
- Invert and drain: Flip the device upside down over a towel immediately so gravity pulls liquid away from the internal circuit board.
- Disassemble and dry: For external keyboards, remove all keycaps and open the outer shell casing if out of warranty. Dab up standing fluid with dry paper towels.
- Flush liquid residues: If soda, juice, or coffee spilled inside, flush affected areas with high-purity isopropyl alcohol to dissolve sticky sugars and displace water.
- Wait 24 to 48 hours: Do not plug the keyboard back in or power on your system for at least 24 to 48 hours. Ensure internal components are totally dry.
What common mistakes damage a keyboard during cleaning?
Avoid these common mistakes to protect your keycaps and electrical circuits from permanent damage:

- Spraying liquids directly onto the keyboard: Dripping liquids sink into casing seams and short out circuit boards. Always apply alcohol or cleaning solutions to a cloth or swab first.
- Using acetone, bleach, or harsh chemicals: Acetone melts ABS plastic keycaps instantly, turning key surfaces into gooey smears. Bleach and ammonia degrade plastic alloys and strip legend printing. Stick exclusively to 70% isopropyl alcohol.
- Applying heat to dry parts: Using hot air from hair dryers or placing keycaps near space heaters warps plastic keycaps, preventing them from fitting back onto switch stems. Air drying at room temperature is safest.
- Inverting compressed air cans: Tilting a compressed air can past 45 degrees releases freezing liquid fluorocarbon propellant, which freezes plastic housings, causes thermal shock to solder joints, and leaves oily residues.
- Yanking keycaps off at an angle: Pulling keycaps sideways or unevenly breaks key stems and bends stabilizer wires. Always pull straight up vertically.
How to prevent dirt buildup and extend keyboard lifespan
Establishing small daily habits keeps your keyboard clean longer and reduces how often you need to perform full deep cleans.
- Wash your hands regularly: Oils, lotions, and sweat transferred from hands form the sticky film that captures dust on keycap surfaces.
- Avoid eating over the keyboard: Food crumbs fall straight down between key gaps, creating breeding grounds for bacteria and jamming switch travel.
- Use a dust cover or desk pad: Cover your keyboard with an acrylic cover or clean cloth when not in use overnight to keep ambient room dust off key rows.
- Maintain a weekly maintenance routine: Incorporate a quick 2-minute compressed air sweep and wipe-down into your regular computer setup care.
- Keep pets off typing surfaces: Animal hair works its way down into switch sliders and stabilizer housings, leading to binding key presses.
Quick clean vs deep clean comparison
| Feature | Quick Clean | Deep Clean |
|---|---|---|
| Recommended Frequency | Weekly or bi-weekly | Every 3 to 6 months |
| Primary Tools Needed | Compressed air, microfiber cloth, 70% isopropyl alcohol | Keycap puller, brush, bowl, dish soap, alcohol swabs |
| Time Required | 5 minutes | 1 to 2 hours (plus 12–24h drying time) |
| Keycap Removal | No keycaps removed | All keycaps removed |
| Best Suited For | All keyboards (laptops, membrane, mechanical) | Standalone mechanical and swappable membrane boards |
Frequently asked questions
How often should I clean my keyboard?
Perform a quick surface clean once a week to remove skin oils and light dust. A thorough deep clean involving keycap removal is recommended every three to six months depending on usage, environment, and whether pets are present.
Is 99% isopropyl alcohol better than 70% for keyboard cleaning?
For surface cleaning keycaps, 70% isopropyl alcohol is preferable because its water content slows down evaporation, giving it enough contact time to kill microbes and dissolve grime. Higher concentrations like 99% evaporate almost instantly and can dull or damage sensitive plastic finishes or printed key legends.
Can keycaps be washed in a dishwasher?
Do not put keycaps in a dishwasher. Dishwasher heating cycles distort plastic keycap dimensions, and harsh dishwasher detergents strip painted lettering and custom legend finishes. Hand washing keycaps in warm dish soap water is safe and effective.
How do you clean under keycaps without a keycap puller?
If you cannot remove keycaps, hold the keyboard upside down at a steep angle while using short bursts of compressed air to push out trapped particles. You can also pass the sticky edge of a folded sticky note or a fine detailing brush between key rows to pull out loose hairs and crumbs.
What should you do if liquid spills on a wireless or backlit keyboard?
Immediately switch off power or remove batteries, turn the keyboard upside down over a dry towel, and do not press any keys. Allow the keyboard to drain and dry inverted for a minimum of 24 to 48 hours before restoring power or attempting to test functionality.