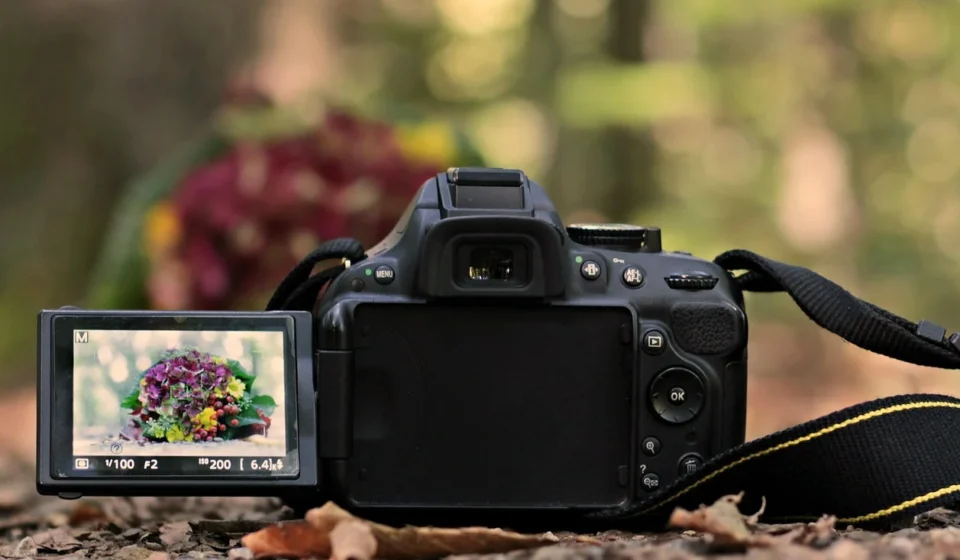
To fix overexposed photos, lower the Highlights slider completely in an editor like Lightroom, Photoshop, or Snapseed. Then lower the Whites and overall Exposure sliders until fine textures reappear. Overexposure occurs when a camera sensor records too much light. This turns bright highlight regions into pure white without texture, tone, or color.
Uncompressed RAW files hold hidden highlight data that editing software can pull back cleanly. However, compressed JPEG files discard extra highlight information inside the camera. Evaluating histograms, highlight clipping warnings, and individual color channels helps determine if blown-out pixels contain recoverable data.
The rest of this guide explains how to analyze image health using visual diagnostic tools. It also performs step-by-step manual tone adjustments, and compares manual editing against AI-powered highlight recovery software.
How do you know if an overexposed photo can be saved?
Before spending time in editing software, you need to evaluate whether your overexposed photo contains recoverable pixel data or unrecoverable clipping. Software tools and camera displays provide visual diagnostic tools to determine image health within seconds.
- Read the histogram graph: A histogram plots tonal distribution from pure black on the far left to pure white on the far right. If your image histogram shows a steep vertical peak smashed directly against the right wall, those pixels are completely clipped. If the curve approaches the right edge without forming a hard vertical line, highlight detail is preserved and fully recoverable.
- Turn on highlight clipping warnings: Known as “blinkies” on camera LCD screens or clipping overlays in software (toggled by pressing the J key in Adobe Lightroom), this setting flashes bright red or black over clipped pixels. If clipping only affects small specular highlights like sunshine bouncing off metal or glass, the photo is easily saved. However, if it covers your subject’s face, skin textures cannot be brought back without artificial reconstruction.
- Analyze individual color channels: Overexposure does not always happen in all three RGB channels simultaneously. For instance, sunlit grass might clip only the green channel, while a warm sunset might clip only the red channel. If one or two color channels remain unclipped, photo editors can interpolate missing detail from the surviving channels to restore realistic texture.
How to fix overexposed photos with manual editing software
When an image comes out bright and washed out, taking a structured approach to post-processing recovers maximum detail without making your photo look dark or muddy. Software applications like Adobe Lightroom, Capture One, Photoshop, Snapseed, and Darktable offer dedicated controls to isolate and pull back blown-out regions.

- Set a baseline with the Exposure slider: Begin by lowering the global Exposure slider slightly, usually between -0.30 EV and -1.00 EV. This darkens the entire frame. As a result, it brings bright highlights back down into the controllable range of your image editor’s processing engine.
- Pull down the Highlights slider: The Highlights slider targets bright mid-tones and soft highlight areas without darkening deep shadows. Slide Highlights to the left, often between -50 and -100. Watch as washed-out skies, cloud contours, and light fabrics recover their original texture.
- Set extreme brightness limits with the Whites slider: The Whites slider defines the absolute brightest point in your image. Hold the Option key (Mac) or Alt key (Windows) while dragging the Whites slider to the left. A black preview mask will appear; drag until all flashing white spots disappear, ensuring no pixels are unnecessarily pushed to pure white.
- Rebalance Shadows and Blacks: Reducing Exposure and Highlights can leave shadow areas looking dull and grey. Counteract this by raising the Shadows slider (+20 to +40) to reveal subject detail, while slightly lowering the Blacks slider (-5 to -15) to preserve punchy contrast.
- Refine brightness roll-off using the Tone Curve: Open the Tone Curve panel to gain micro-control over specific brightness bands. Click the upper-right quadrant of the point curve (representing highlights) and gently pull it downward. This creates a soft curve that prevents harsh, unnatural boundaries between recovered highlights and adjacent mid-tones.
- Apply targeted local adjustment masks: Global slider adjustments affect the entire frame. This can introduce unwanted dark patches in correctly exposed areas. Use local tools like Linear Gradients over bright skies, Radial Masks over bright faces, or Brush Masks to reduce exposure and highlights exclusively over clipped regions. If you are learning foundational Photoshop techniques, see Filtering AI Updates to Improve Your Workflow for step-by-step masking workflows.
- Restore lost color saturation in the HSL panel: As pixels get overexposed, they lose color saturation and turn white. After lowering exposure sliders, recovered highlight areas often look desaturated or grey. Open the HSL (Hue, Saturation, Luminance) panel, select the affected color channel (such as Blue for skies or Orange for skin), slightly boost saturation, and decrease luminance to bring back vivid color.
If you have multiple exposures or bracketed layers from a single scene, consider using blending modes in Photoshop to combine dark highlight layers with bright shadow layers for complete control over dynamic range.
Manual editing vs AI-powered editing for highlight recovery
Artificial intelligence photo tools have changed how editors fix overexposed photos. Modern platforms use intelligent scene recognition to analyze pixel patterns. They also rebuild missing highlight information, or automatically isolate and replace completely unrecoverable skies.
Selecting between manual tone editing and AI recovery tools depends on your output goals, volume of photos, and required level of artistic precision.
| Feature | Manual Editing (e.g., Lightroom) | AI-Powered Editing (e.g., Evoto AI) |
|---|---|---|
| Control & Precision | High; granular control over every aspect | Moderate; automated decisions may lack specific nuance |
| Speed & Efficiency | Slower; requires skill and time for each image | Very Fast; ideal for batch processing |
| Learning Curve | Steep; requires understanding of tools and concepts | Low; often one-click solutions |
| Result Fidelity | Best for critical, high-quality output; natural look | Good, but can sometimes look processed or artificial |
| Cost | Adobe Creative Cloud Photography Plan ~$9.99/month | Varies, often subscription-based ~$5-15/month per service |
Pros of Manual Editing
- Unmatched Control: You dictate every adjustment, ensuring your artistic vision is met.
- Subtle & Natural Results: Skilled manual edits blend smoothly, avoiding an ‘over-edited’ look.
- Deeper Understanding: Learning manual techniques builds foundational photography knowledge.
- Works on Tricky Edges: Better at handling complex outlines or fine details where AI might struggle.
Cons of Manual Editing
- Time-Consuming: Each image can take significant time, especially for complex corrections.
- Steep Learning Curve: Requires dedication to learn various tools and their interactions.
- Not Ideal for Volume: Inefficient for processing hundreds of images quickly.
- Results Vary by Skill: Quality is highly dependent on the editor’s experience.
Pros of AI-Powered Editing
- Speed & Automation: Quickly fixes multiple images, saving immense time.
- Ease of Use: Often requires minimal input, accessible to beginners.
- Consistent Results: Can apply similar corrections across a batch of photos efficiently.
- Cost-Effective for Basic Needs: Many tools are relatively affordable, some even free for basic use.
Cons of AI-Powered Editing
- Less Control: You give up fine-tuned creative control to the algorithm.
- Potential for Artifacts: Can sometimes introduce unnatural textures or color shifts in complex areas.
- Data Dependency: Effectiveness relies heavily on the quality of the original image data.
- Generic Look: May produce a more standardized aesthetic, lacking unique artistic touches.
What goes wrong when fixing overexposed photos (and how to solve it)?
Attempting to fix overexposed photos through aggressive editing slider adjustments often introduces new image flaws. Recognizing these common problems allows you to make corrections while preserving a clean, natural image standard.
Flat, grey skin tones in portraits: Dragging the Highlights slider all the way to -100 on an overexposed portrait often turns bright forehead or cheek highlights into a muddy grey color. To resolve this, reset global highlights to a moderate value like -30. Apply a soft Brush Mask exclusively over bright skin areas. Then drop exposure by -0.3 EV, and increase Color Temperature slightly to add natural skin warmth.
Magenta or green tint shifts in highlights: When an overexposed shot clips one color channel before the others, lowering exposure causes the unclipped channels to skew overall color balance, creating ugly pink or green patches. Fix this tint artifact by selecting the targeted adjustment brush, lowering saturation slightly over the tinted region, or making precise channel tweaks in the Point Curve panel.
Visible edge halos along sky borders: Aggressively pulling down exposure on a background sky while keeping foreground subjects bright creates unnatural glowing white edges around trees, rooflines, and hair. You can prevent halos by refining local mask boundaries using Luminance Range Masking. This limits dark tone adjustments exclusively to bright sky pixels.
Increased digital noise in recovered shadow areas: Lowering global Exposure to recover clipped clouds darkens mid-tones and shadows. This brings shadow noise into clean areas of your photo. Mitigate this by leaving global exposure balanced and using local masks for highlight areas. Alternatively, apply targeted AI Denoise to smooth out shadow regions afterwards.
How do you prevent overexposure while taking photos?
While post-processing software provides robust tools to recover bright areas, taking proactive steps in-camera ensures clean detail capture across your entire frame.

Use Exposure Compensation: Modern digital cameras feature an exposure compensation control button or dial marked with +/-. In bright light or reflective conditions, dial in negative exposure compensation (-0.3, -0.7, or -1.0 EV). This forces your camera to select faster shutter speeds or smaller apertures, preserving critical highlight details.
Select appropriate camera metering modes: Standard Matrix or Evaluative metering averages light across the whole frame, which often causes bright skies or sunlight patches to overexpose when subjects sit in dark shadows. Switch to Spot Metering or Center-Weighted Metering to calculate exposure directly off bright highlight areas.
Practice Expose to the Right (ETTR): ETTR is an advanced photographic exposure strategy. Here you adjust camera settings to push the histogram graph as far to the right as possible without letting graph data smash against the right wall. This gathers maximum light data across sensor pixels without clipping highlights. As a result, it yields maximum dynamic range and minimal shadow noise after post-processing.
Set up Automatic Exposure Bracketing (AEB): When shooting scenes with extreme contrast like landscapes or real estate interiors, turn on exposure bracketing. Your camera will capture multiple shots—typically one underexposed, one normal, and one overexposed—with a single press of the shutter. You can combine these bracketed exposures later in software to build a balanced high dynamic range image.
Attach Neutral Density (ND) filters: Physical Neutral Density filters screw onto your lens. They reduce incoming light without altering color tint. Using an ND filter in harsh midday sunlight allows you to use wider apertures or slower shutter speeds without overwhelming your camera sensor.
According to a 2023 article by Digital Photography School, checking your histogram regularly is one of the most effective ways to avoid overexposure while shooting. Also, Adobe HelpX strongly recommends RAW for professional editing. This is because uncompressed sensor files provide maximum latitude for exposure adjustments without image degradation.
Frequently asked questions
Can you fix a completely overexposed photo?
It depends on the severity of light saturation and the file format. If highlights are completely clipped in an 8-bit JPEG, pure white pixels contain no data and cannot be brought back. RAW files contain far more uncompressed sensor data, allowing software to recover significant highlight detail even from seemingly blown-out areas.
What is the best software to fix overexposed photos?
Adobe Lightroom and Photoshop are industry standards for precise, non-destructive manual recovery using tone sliders and local masks. For rapid automated workflows, AI-powered editors like Evoto AI and LightX offer fast sky reconstruction and automated tone balancing.
Is it better to underexpose or overexpose when shooting?
It is generally better to slightly underexpose than to overexpose, especially when shooting JPEGs. Modern camera sensors retain far more detail in dark shadow areas, which can be lifted cleanly during editing, whereas clipped highlights result in permanent loss of texture.
How does dynamic range affect overexposure recovery?
Dynamic range represents the full spectrum of light intensities a sensor can record simultaneously. If a high-contrast scene exceeds your camera sensor’s dynamic range capacity, extreme highlights will clip to pure white, reducing your latitude for post-processing recovery.
Can mobile phones fix overexposed photos?
Yes, modern mobile editing applications like Snapseed, Lightroom Mobile, and Apple Photos allow you to lower exposure, highlights, and white points directly on smartphones. Many newer phones can also capture RAW photos in DNG format, providing greater latitude for highlight recovery.