
To develop a travel app, start with a clear vision, understand your audience, and define your unique value proposition. This process involves market research, feature planning, selecting appropriate technology, and navigating a multi-stage development journey to bring your engaging application to life.
The initial steps involve defining your app’s core purpose, understanding target users, and researching competitors. Successful development also requires planning essential features for an MVP and future iterations, considering the varied costs, and making crucial technical decisions like choosing the right technology stack and designing a solid backend.
Why should you develop a travel app?
You should develop a travel app if you identify a specific problem or unmet need within the travel industry that technology can solve, or if you aim to enhance an existing travel experience significantly. The travel market is vast and constantly evolving, with users consistently seeking convenience, personalization, and efficiency in their journeys.
For example, while there are many flight booking apps, a niche could be an app focused solely on sustainable travel options, or one that specializes in last-minute, budget-friendly weekend getaways within a specific region. The key is to avoid simply replicating existing solutions and instead focus on a distinct value proposition. The most successful apps often simplify complex processes or offer highly personalized experiences that resonate with a particular segment of travelers.
What are the initial steps to creating a travel app?
The initial steps for how to develop a travel app involve defining your app’s core purpose, understanding your target users, and researching the competitive landscape. This foundational work ensures your development efforts are directed towards a viable and valuable product.

Defining Your Niche and Target Audience
Before writing a single line of code, you need to pinpoint who your app is for and what specific problem it solves, which is key for how to develop a travel app. Are you targeting budget backpackers, luxury travelers, business commuters, or families? Each group has distinct needs and pain points. For instance, an app for backpackers might prioritize hostel bookings and local experiences, while a business travel app would focus on expense tracking and corporate booking tools.
We always recommend starting with a very narrow focus. Instead of trying to be an ‘all-in-one’ travel app, consider something specific, like ‘a travel app for solo female travelers in Southeast Asia’ or ‘a travel itinerary app for road trips in the Pacific Northwest.’ This specificity helps you design features that truly cater to your users and makes your marketing efforts more effective, which is key for how to develop a travel app.
Market Research and Competitor Analysis
Once you have a niche, dive deep into market research. For example, what existing apps are already serving this audience? What are their strengths and weaknesses? Look at user reviews on app stores to understand what people love and hate about current solutions. Are there gaps in their offerings that your app could fill?
This analysis isn’t about copying; it’s about identifying opportunities for differentiation. For example, you might find that existing apps lack a crucial feature, have a clunky user interface, or don’t cater to a specific cultural preference. This insight will inform your unique selling proposition (USP) for how to develop a travel app.
How do you plan the features for a travel app?
Planning the features for a travel app involves prioritizing core functionalities that address your target audience’s primary needs, followed by secondary features that enhance the user experience. You should distinguish between ‘must-have’ Minimum Viable Product (MVP) features and ‘nice-to-have’ additions for future iterations.

Essential Features for a Travel App (MVP)
For a successful launch, your MVP should include only the most critical features that deliver core value. This allows you to test your concept with real users quickly and gather feedback for future improvements. For example, here are some common MVP features for travel apps:
- User Profile/Onboarding: Simple registration, personalized preferences.
- Search & Discovery: Ability to find destinations, accommodations, flights, or activities relevant to your niche.
- Booking/Reservation (if applicable): Integration with booking engines or direct reservation capabilities.
- Itinerary Builder: For travel planning apps, this is central. Users can add and organize activities, flights, and accommodations.
- Maps & Navigation: Basic mapping functionalities, points of interest.
- Notifications: Alerts for bookings, itinerary changes, or relevant offers.
Advanced Features for Future Iterations
Once your MVP is stable and gaining traction, you can consider adding more sophisticated features:
- Offline Access: Essential for travelers in areas with limited connectivity.
- Personalized Recommendations: AI-driven suggestions based on past behavior or preferences.
- Social Sharing & Community: Allowing users to share plans, photos, or connect with other travelers.
- In-app Chat/Support: For direct communication with providers or customer service.
- Currency Converter & Translator: Practical tools for international travel.
- Expense Tracker: For budgeting and managing costs on the go.
- Augmented Reality (AR): For interactive city guides or landmark identification.
We advise against trying to build all these at once. Focus on perfecting your core offering first.
How much does it cost to develop a travel app?
The cost to develop a travel app varies significantly, typically ranging from tens of thousands to several hundred thousand dollars, depending on the app’s complexity, the number of features, the chosen platform (iOS, Android, or both), and the development team’s location and expertise. A simple MVP might start at around $30,000 to $50,000, while a feature-rich, complex app could exceed $200,000 or more.

This is a broad estimate, and the biggest cost drivers are usually the complexity of integrations (e.g., with multiple booking APIs), advanced features like AI or real-time tracking, and the quality of the UI/UX design. Development teams in regions like North America or Western Europe generally have higher hourly rates compared to teams in Eastern Europe or Asia, which can significantly impact the overall budget.
Factors Influencing Development Cost
- Platform: Developing for both iOS and Android (native apps) is more expensive than a single platform or a cross-platform solution.
- Features & Complexity: More features, especially complex ones requiring extensive backend development or third-party integrations, increase costs.
- UI/UX Design: A unique, intuitive, and visually appealing design requires more effort and skilled designers.
- Backend Infrastructure: The databases, APIs, and server logic needed to support the app’s functionalities.
- Integrations: Connecting with external services like payment gateways, mapping services, weather APIs, or airline/hotel booking systems.
- Testing & Quality Assurance: Essential for a bug-free experience, adding to the total cost.
- Maintenance & Updates: Ongoing costs for bug fixes, feature enhancements, and compatibility updates.
What are the technical considerations for building a travel application?
Building a travel application involves crucial technical considerations, including choosing the right technology stack, designing a solid backend, ensuring data security, and planning for scalability. As a result, these decisions impact the app’s performance, maintenance, and future growth potential.

Choosing Your Technology Stack
Your technology stack refers to the programming languages, frameworks, and tools used to build your app. You essentially have two main approaches:
- Native Development: Building separate apps for iOS (Swift/Objective-C) and Android (Kotlin/Java). This offers the best performance, user experience, and access to device-specific features. It’s generally more expensive and time-consuming.
- Cross-Platform Development: Using frameworks like React Native, Flutter, or Xamarin to write a single codebase that runs on both iOS and Android. This is faster and more cost-effective but might involve some compromises on performance or access to very specific native features.
We often recommend cross-platform for MVPs or projects with tighter budgets, as it allows for quicker market entry. However, if your app requires heavy graphics, complex animations, or deep hardware integration, native development is usually the superior choice.
Backend and API Integrations
The backend is the ‘brain’ of your app, handling data storage, user authentication, and business logic. Travel apps, however, often rely heavily on APIs (Application Programming Interfaces) to fetch data from external sources like:
- Mapping Services: Google Maps API, Mapbox.
- Flight/Hotel Booking APIs: Amadeus, Sabre, Expedia.
- Payment Gateways: Stripe, PayPal, Braintree.
- Weather Services: OpenWeatherMap.
A well-designed backend ensures your app runs smoothly and can handle a large number of users and data requests. Therefore, it’s a critical component we emphasize for long-term success.
Data Security and Privacy
Travel apps handle sensitive user data, including personal details, payment information, and location data. Therefore, ensuring solid data security and compliance with regulations like GDPR or CCPA is paramount. This involves:
- Encryption: Protecting data both in transit and at rest.
- Secure Authentication: Implementing strong login mechanisms.
- Privacy Policies: Clearly outlining how user data is collected, used, and stored.
- Regular Security Audits: Identifying and patching vulnerabilities.
How to make a travel itinerary app specifically?
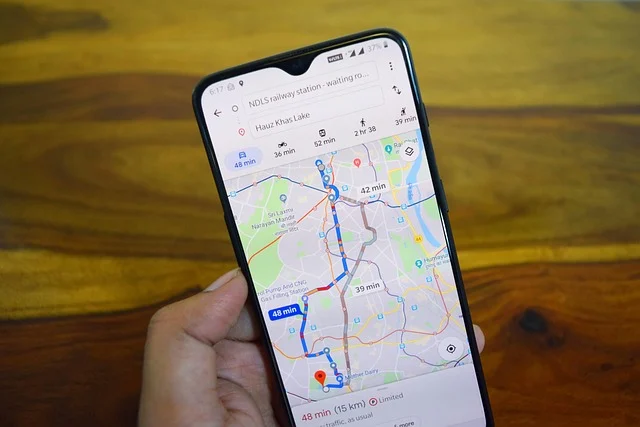
To make a travel itinerary app specifically, focus on core functionalities that allow users to plan, organize, and manage their trip schedules efficiently, integrating features like date and time management, location tagging, and shareable plans. The primary goal is to simplify the complex process of trip planning.
Key Features for an Itinerary App
- Multi-day/Multi-destination Planning: Users can create itineraries spanning several days and locations.
- Event Scheduling: Add specific activities, flights, accommodations with dates, times, and notes.
- Location Integration: Link itinerary items to maps for easy navigation and distance calculation.
- Document Storage: Allow users to upload and store booking confirmations, tickets, and passports securely.
- Collaboration/Sharing: Enable users to share itineraries with travel companions and allow for collaborative editing.
- Real-time Updates: Potentially integrate with flight tracking or weather services to provide live updates relevant to the itinerary.
- Budgeting Tool: Integrate a simple expense tracker for each trip segment.
The differentiator for a great itinerary app often lies in its user-friendliness and flexibility. Travelers’ plans change, so the app needs to make it easy to modify schedules on the fly. Gmail Privacy Lawsuits: What Users Need to Know for a deeper dive into creating efficient user interfaces.
How can you create a travel party universal app?
To create a travel party universal app, you should design a platform that facilitates group travel planning, coordination, and communication across various devices and operating systems. This means prioritizing features that enable shared access, collaborative decision-making, and real-time updates among all members of a travel group.

Features for a Collaborative Travel App
- Group Creation & Management: Allow a ‘trip organizer’ to create a trip and invite other members.
- Shared Itinerary: All members can view, and potentially edit, the same itinerary in real-time.
- Group Chat/Messaging: In-app communication for discussions, polls, and quick updates.
- Expense Splitting: Tools to track shared costs and calculate who owes whom.
- Document Sharing: A central place for all group members to access tickets, hotel confirmations, etc.
- Voting/Decision Making: For choosing activities, restaurants, or accommodations as a group.
- Location Sharing: Optional real-time location sharing among group members during the trip.
The ‘universal’ aspect means it should ideally work smoothly on both iOS and Android, and potentially a web interface. For this reason, cross-platform development frameworks like Flutter or React Native are often a strong choice for how to develop a travel app of this type, to ensure broad accessibility without doubling development efforts.
Sources: Google Travel, Develop for Android
Frequently asked questions
What is the typical timeline for travel app development?
The typical timeline for travel app development can range from 4–6 months for a basic MVP to 12-18 months or more for a complex, feature-rich application. This includes phases like planning, UI/UX design, frontend and backend development, testing, and deployment.
Should I build a native or cross-platform travel app?
You should build a native travel app if performance, platform-specific features, and the absolute best user experience are critical, and you have the budget for separate iOS and Android development. However, choose a cross-platform approach (e.g., Flutter, React Native) for how to develop a travel app if you need to launch faster, have a tighter budget, and want to reach both iOS and Android users with a single codebase, accepting minor compromises.
How do travel apps generate revenue?
Travel apps typically generate revenue through various models, including commission from bookings (flights, hotels, activities), in-app advertising, premium subscriptions for advanced features, referral fees, and selling user data insights (anonymized and aggregated) to travel businesses.